Home Inspection For SE Michigan, Northwest Ohio, Toledo Ohio
  • Home
  • Services
    • Well Inspections
    • Residential Inspection
    • Commercial Inspection
    • Infared/Thermal Imaging
    • Radon Testing
    • Mold Inspections
    • Septic Inspections
    • Pest Inspections
    • Water Quality Testing
    • Structural Inspections
    • Sewer Scope
    • Manufactured Home Certs
    • Home Binder
  • Areas Served
  • Schedule
  • Reviews
  • Contact
  • Blog

Kickout Flashing

1/12/2018

0 Comments

 
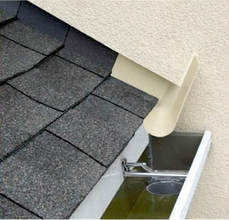
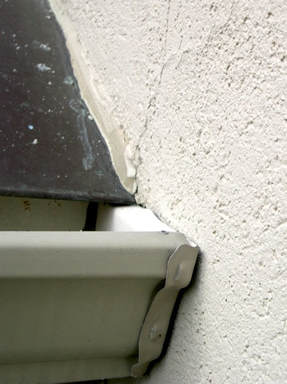
Kickout flashing, also known as diverter flashing, is a special type of flashing that diverts rainwater away from the cladding and into the gutter. When installed properly, they provide excellent protection against the penetration of water into the building envelope. 
Several factors can lead to rainwater intrusion, but a missing kickout flashing, in particular, often results in concentrated areas of water accumulation and potentially severe damage to exterior walls. InterNACHI inspectors should make sure that kickouts are present where they are needed and that they are installed correctly. Water penetration into the cladding can occasionally be observed on the exterior wall in the form of vertical water stains, although inspectors should not rely on visual identification. There may be severe damage with little or no visible evidence.
Picture
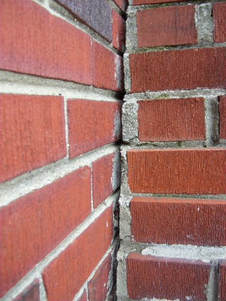
The kickout was never installed.
  • The need for kickout flashing developed fairly recently and the builder may not have been aware that one was required. The increased amount of insulation and building wrap that is used in modern construction makes buildings less breathable and more likely to sustain water damage. Kickout flashing prevents rainwater from being absorbed into the wall and is more essential than ever.

The following are locations where kickout flashing is critical:
  • anywhere a roof and exterior wall intersect, where the wall continues past the lower roof-edge and gutter. If a kickout flashing is absent in this location, large amounts of water may miss the gutter, penetrate the siding, and become trapped inside the wall; and
  • where gutters terminate at the side of a chimney.
Picture
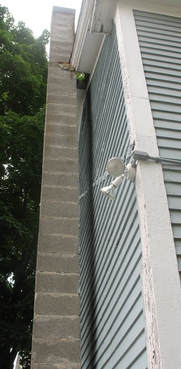
The kickout was improperly installed.
  • The bottom seam of the flashing must be watertight. If it is not, water will leak through the seam and may penetrate the cladding. 
  • The angle of the diverter should never be less than 110 degrees.
  • The kick-out was modified by the homeowner.
  • Homeowners who do not understand the importance of kickouts may choose to alter them because they are unsightly. A common way this is done is to shorten their height to less than the standard six inches (although some manufacturers permit four inches), which will greatly reduce their effectiveness. Kickout flashings should be the same height as the side wall flashings.
  • Homeowners may also make kickout flashings less conspicuous by cutting them flush with the wall. ​
In summary, kickout flashing should be present and properly installed in order to direct rainwater away from the cladding.
0 Comments

Ice Dams: Prevention & Removal Methods

1/2/2018

0 Comments

 
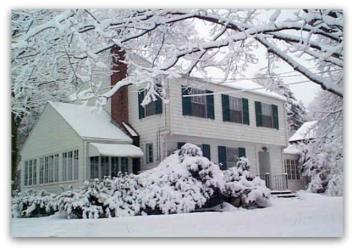
An ice dam is a ridge of ice that forms at the edge of a roof and prevents melting snow from draining. As water backs up behind the dam, it can leak through the roof and cause damage to walls, ceilings, insulation and other areas.
 
How do ice dams form?
 
Ice dams are formed by an interaction between snow cover, outside temperatures, and heat lost through the roof. Specifically, there must be snow on the roof, warm  portions of the upper roof (warmer than 32° F), and cold portions of the lower roof (at freezing or below). Melted snow from the warmer areas will refreeze when it flows down to the colder portions, forming an ice dam.
 
Although the primary contributor to snow melting is heat loss from the building's interior, solar radiation can also provide sufficient heat to melt snow on a roof. For example, in southern Canada, enough sunlight can be transmitted through 6 inches (150 mm) of snow cover on a clear and sunny day to cause melting at the roof's surface even when the outside temperature is 14° F (-10° C), with an attic temperature of 23° F (-5° C).
 
Gutters do not cause ice dams to form, contrary to popular belief. Gutters do, however, help concentrate ice from the dam in a vulnerable area, where parts of the house can peel away under the weight of the ice and come crashing to the ground.
 
Problems Associated with Ice Dams
 Ice dams are problematic because they force water to leak from the roof into the building envelope. This may lead to:
  • rotted roof decking, exterior and interior walls, and framing;
  • respiratory illnesses (allergies, asthma, etc.) caused by mold growth;
  • reduced effectiveness of insulation. Wet insulation doesn’t work well, and chronically wet insulation will not decompress even when it dries. Without working insulation, even more heat will escape to the roof where more snow will melt, causing more ice dams which, in turn, will lead to leaks; and
  • peeling paint. Water from the leak will infiltrate wall cavities and cause paint to peel and blister. This may happen long after the ice dam has melted and thus not appear directly related to the ice dam.
Prevention
  • Keep the entire roof cold. This can be accomplished by implementing the following measures:
    • Install a metal roof. Ice formations may occur on metal roofs, but the design of the roof will not allow the melting water to penetrate the roof's surface. Also,snow and ice are more likely to slide off of a smooth, metal surface than asphalt shingles.
    • Seal all air leaks in the attic floor, such as those surrounding wire and plumbing penetrations, attic hatches, and ceiling light fixtures leading to the attic from the living space below.
    • Increase the thickness of insulation on the attic floor, ductwork, and chimneys that pass through the attic.
  • Move or elevate exhaust systems that terminate just above the roof, where they are likely to melt snow.
  • A minimum of 3" air space is recommended between the top of insulation and roof sheathing in sloped ceilings.
  • Remove snow from the roof. This can be accomplished safely using a roof rake from the ground. Be careful not to harm roofing materials or to dislodge dangerous icicles.
  • Create channels in the ice by hosing it with warm water. Because this process intentionally adds water to the roof, this should be done only in emergencies where a great deal of water is already flowing through the roof, and when temperatures are warm enough that the hose water can drain before it freezes.
Prevention and Removal Methods to Avoid
  • electric heat cables. These rarely work, they require effort to install, they use electricity, and they can make shingles brittle.
  • manual removal of the ice dam using shovels, hammers, ice picks, rakes, or whatever destructive items can be found in the shed. The roof can be easily damaged by these efforts, as can the homeowner, when they slip off of the icy roof.
In summary, ice dams are caused by inadequate attic insulation, but homeowners can take certain preventative measures to ensure that they are rare.
0 Comments

Holiday Home Safety Tips

12/1/2017

0 Comments

 
The winter holidays are a time for celebration, and that means more cooking, home decorating, entertaining, and an increased risk of fire and accidents. InsideOut recommends that you follow these guidelines to help make your holiday season safer and more enjoyable.

Holiday Lighting

  • Use caution with holiday decorations and, whenever possible, choose those made with flame-resistant, flame-retardant and non-combustible materials.
  • Keep candles away from decorations and other combustible materials, and do not use candles to decorate Christmas trees.
  • Carefully inspect new and previously used light strings, and replace damaged items before plugging lights in. If you have any questions about electrical safety, ask an InterNACHI inspector during your next scheduled inspection. Do not overload extension cords.
  • Don't mount lights in any way that can damage the cord's wire insulation.  To hold lights in place, string them through hooks or insulated staples--don't use nails or tacks. Never pull or tug lights to remove them.
  • Keep children and pets away from light strings and electrical decorations.
  • Never use electric lights on a metallic tree. The tree can become charged with electricity from faulty lights, and a person touching a branch could be electrocuted.
  • Before using lights outdoors, check labels to be sure they have been certified for outdoor use.  
  • Make sure all the bulbs work and that there are no frayed wires, broken sockets or loose connections.
  • Plug all outdoor electric decorations into circuits with ground-fault circuit interrupters to avoid potential shocks.
  • Turn off all lights when you go to bed or leave the house. The lights could short out and start a fire.

Decorations

  • Use only non-combustible and flame-resistant materials to trim a tree. Choose tinsel and artificial icicles of plastic and non-leaded metals.
  • Never use lighted candles on a tree or near other evergreens. Always use non-flammable holders, and place candles where they will not be knocked down.
  • In homes with small children, take special care to avoid decorations that are sharp and breakable, and keep trimmings with small removable parts out of the reach of children.
  • Avoid trimmings that resemble candy and food that may tempt a young child to put them in his mouth.

Holiday Entertaining

  • Unattended cooking is the leading cause of home fires in the U.S.  When cooking for holiday visitors, remember to keep an eye on the range.
  • Provide plenty of large, deep ashtrays, and check them frequently. Cigarette butts can smolder in the trash and cause a fire, so completely douse cigarette butts with water before discarding.
  • Keep matches and lighters up high, out of sight and reach of children (preferably in a locked cabinet).
  • Test your smoke alarms, and let guests know what your fire escape plan is.

Trees

  • When purchasing an artificial tree, look for the label "fire-resistant."
  • When purchasing a live tree, check for freshness. A fresh tree is green, needles are hard to pull from branches, and when bent between your fingers, needles do not break.
  • When setting up a tree at home, place it away from fireplaces, radiators and portable heaters. Place the tree out of the way of traffic and do not block doorways.
  • Cut a few inches off the trunk of your tree to expose the fresh wood. This allows for better water absorption and will help to keep your tree from drying out and becoming a fire hazard.
  • Be sure to keep the stand filled with water, because heated rooms can dry live trees out rapidly.
  • Make sure the base is steady so the tree won't tip over easily.

Fireplaces

  • Before lighting any fire, remove all greens, boughs, papers and other decorations from fireplace area. Check to see that the flue is open.
  • Use care with "fire salts," which produce colored flames when thrown on wood fires. They contain heavy metals that can cause intense gastrointestinal irritation and vomiting if eaten.
  • Do not burn wrapping papers in the fireplace. A flash fire may result as wrappings ignite suddenly and burn intensely.

Toys & Ornaments

  • Purchase appropriate toys for the appropriate age. Some toys designed for older children might be dangerous for younger children.
  • Electric toys should be UL/FM approved.
  • Toys with sharp points, sharp edges, strings, cords, and parts small enough to be swallowed should not be given to small children.
  • Place older ornaments and decorations that might be painted with lead paint out of the reach of small children and pets. 

Children & Pets

  • Poinsettias are known to be poisonous to humans and animals, so keep them well out of reach, or avoid having them.
  • Keep decorations at least 6 inches above the child’s reach.
  • Avoid using tinsel. It can fall on the floor and a curious child or pet may eat it. This can cause anything from mild distress to death.
  • Keep any ribbons on gifts and tree ornaments shorter than 7 inches. A child could wrap a longer strand of ribbon around their neck and choke.
  • Avoid mittens with strings for children. The string can get tangled around the child’s neck and cause them to choke. It is easier to replace a mitten than a child.
  • Watch children and pets around space heaters or the fireplace. Do not leave a child or pet unattended.
  • Store scissors and any sharp objects that you use to wrap presents out of your child’s reach.
  • Inspect wrapped gifts for small decorations, such as candy canes, gingerbread men, and mistletoe berries, all of which are choking hazards.

Security

  • Use your home burglar alarm system.
  • If you plan to travel for the holidays, don’t discuss your plans with strangers. 
  • Have a trusted friend or neighbor to keep an eye on your home.
InsideOut Inspections Plus would like to wish all of our readers, clients and realtors a safe & joyous holiday season!
Picture
0 Comments

Inspecting Your HVAC System (Before They Check Out On You!)

11/10/2017

41 Comments

 
Have you ever woken up in the middle of a winter night, shivering under the blankets and able to see your breath? Or have you ever watched the thermostat creep into the upper 80s during a record-setting heat wave, realizing you haven't heard the air conditioner kick on? If so, your heating or cooling system was on the fritz—and (of course), it happened at the worst possible time.
Picture
These systems not only fail when you need them the most, but also during the hardest time of the year to get a heating, ventilation and air-conditioning (HVAC) contractor to come by for repairs. Naturally, technicians are at their busiest when these systems are busiest. So, unless you have a relative in the business, the best way to ensure your heating and cooling systems keep working is to maintain them properly.
To guard against a future breakdown, have a professional perform periodic maintenance on the systems before the peak seasons begin. Have the heating system serviced in late summer or early fall, and keep in mind that priority scheduling for repeat customers may begin mid-summer. For a central air-conditioning system, arrange to have a pro check it out in the early spring, after temperatures have reached 65° F, depending on when it starts getting hot in your region.
A typical maintenance call will involve tightening electrical connections, checking the condition of hoses and belts, lubricating all moving parts, and making sure the controls work properly.
For cooling components, the contractor will clean the evaporator coils that remove the heat from the air in your home, as well as the condenser coils that release the collected heat to the outside air. Your tech will also check the fan components, make sure the refrigerant level in the system is correct, inspect ductwork and gas lines, and check for leaks.
For heating systems, technicians typically check fuel connections, change the filters, and inspect the system's combustion and heat exchangers.

What You Can Do To Keep Your HVAC System Operating!

Here are a few maintenance tasks you can perform yourself:
  • For ongoing maintenance, change the filters every three months for a forced-air system that includes both heating and cooling. If the systems are separate, change the filters every three months during the heating or cooling season. The type of filter to use and directions for changing it can be found in the manual that comes with installation. Instructions may also come with the filter, or on a label affixed to the HVAC unit.  You an also ask an HVAC contractor for advice, or visit the manufacturer's website to see if information is available online.

  • Check around the house to make sure all heating and cooling vents, baseboard heaters, and radiators are not blocked by furniture.  If they are blocked, the system has to work harder to provide you with the comfort you want, placing a strain on the system.

  • Air-conditioning systems often have an outdoor component that houses the compressor and condenser. This part of the system dumps hot air from your house to the outside as part of the cooling cycle. Remove leaves and other debris off of the top of the unit, and maintain a clearance of 2 to 3 feet around it.

Repair Vs. Replace

If your HVAC system does break down, you will be faced with the decision of whether to repair or replace it. Repairs are less expensive, but there are a number of reasons to consider replacing the entire unit.
  1. The system is eight to 15 years old. While a properly maintained system can last longer than 15 years, some older equipment is not as efficient as those available today. And with the average household spending almost half its energy budget on heating and cooling costs, it makes sense to install an energy-efficient system. For example, the annual fuel utilization efficiency (AFUE) rating measures how much fuel a furnace or boiler converts to heat and how much is wasted. It is not unusual to find old furnaces with an AFUE below 70%, which means that over 30% of the fuel is wasted. High-efficiency furnaces available today can achieve AFUE ratings above 98%.  That could mean a reduction in heating bills of 20 to 30%. Likewise, the seasonal energy-efficiency ratio (SEER) can be as low as 8 to 10 SEER in older units, while newer units often boast up to 25 SEER, translating to a reduction of up to 50% of cooling costs.

  2. The system needs to be repaired frequently. Even if the repairs are minor, having an HVAC contractor on speed dial does not bode well for the future. If you are faced with a major repair—such as a compressor for an air conditioner, or a blower motor for a furnace—and you have had to pay for a similar repair recently, it is time to replace the unit. 

  3. Energy bills keep going up and the house is too hot or too cold. There could be a number of reasons for this, such as leaky ducts, or a lack of insulation and weather sealing in the walls and ceiling. However, it could also mean that the current system is not the right size for the house. A properly sized system would solve that problem quickly.
When faced with a large repair, discuss your options with a qualified HVAC contractor. If you choose a replacement, make sure you hire a reputable, licensed and insured contractor associated with a company you can trust, and confirm that you have a sufficient warranty to insure you against installation and mechanical errors.  And after the repair or replacement, keep it well maintained
41 Comments

Winterizing Your Home!

11/2/2017

2 Comments

 
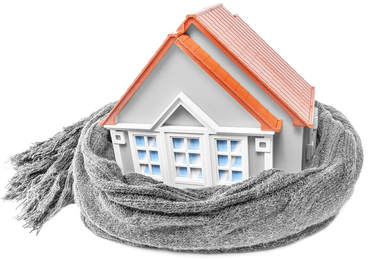
 Winterization is the process of preparing a home for the harsh conditions of winter. It is usually performed in the fall before snow and excessive cold have arrived. Winterization protects against damage due to bursting water pipes, and from heat loss due to openings in the building envelope. Inspectors should know how winterization works and be able to pass this information on to their clients

Plumbing System Winterizing

Water damage caused by bursting pipes during cold weather can be devastating. A ruptured pipe will release water and not stop until someone shuts off the water. If no one is home to do this, an enormous quantity of water can flood a house and cause thousands of dollars' worth of damage
Picture
Even during very small ruptures or ruptures that are stopped quickly, water leakage can result in mold and property damage. Broken water pipes can be costly to repair.
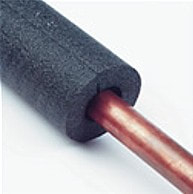
  • All exposed water pipes in cold areas, such as attics, garages, and crawlspaces, should be insulated. Foam or fiberglass insulation can be purchased at most hardware stores.  Insulation should cover the entirety of a pipe. 
  • Plastic is more tolerant of cold expansion than copper or steel. Houses in colder climates might benefit from the exclusive use of approved plastic plumbing.  
  • Water supply for exterior pipes should be shut off from inside the house and then drained.
  • Sprinkler systems are particularly vulnerable to cracking due to cold-weather expansion. In addition to turning them, it helps to purge the system of any remaining water with compressed air. 
  • Homeowners should be aware that much of the plumbing system travels through areas that are significantly colder than the rest of the house. Because it is impossible to monitor the temperature of every portion of the plumbing system, indoor air temperature should be kept high enough throughout the winter to keep pipes in any unheated places from freezing.

Leaks In The Building Envelope

Leaky window frames, door frames, and electrical outlets can allow warm air to escape into the outdoors.
  • Windows that leak will allow cold air into the home. Feeling for drafts with a hand or watching for horizontal smoke from an incense stick are a few easy ways to inspect for leaks. They can be repaired with tape or caulk. 
  • On a breezy day, a homeowner can walk through the house and find far more leaks than they knew existed. Leaks are most likely in areas where a seam exists between two or more building materials.

Insulation

  • Because hot air rises into the attic, a disproportionately larger amount of heat is lost there than in other parts of the house. Like a winter hat that keeps a head warm, adequate attic insulation will prevent warm indoor air from escaping. Attic insulation should be 12 inches thick in cold climates.
  • Storm doors and windows should be installed to insulate the house and protect against bad weather.

Heating System Winterizing

The heating system is used most during the winter so it’s a good idea to make sure that it works before it’s desperately needed. The following inspection and maintenance tips can be of some help to homeowners:
  • Test the furnace by raising the temperature on the thermostat. If it does not respond to the adjustment quickly it might be broken. 
  • Replace the air filter if it’s dirty.
  • If the furnace is equipped with an oil or propane tank, the tank should be full.
Picture

Cooling System Winterizing

  • Use a hose to remove leaves and other debris from the outdoor condensing unit, if the home is equipped with one. Protect the unit with a breathable waterproof cover to prevent rusting and freezing of its components.
  • Remove and store window air conditioners when they are no longer needed. Cold air can damage their components and enter the house through openings between the air conditioner and the windowpane. 
  • Ceiling fans can be reversed in order to warm air trapped beneath the ceiling to recirculate. A fan has been reversed if it spins clockwise.

Chimneys & Fireplaces Winterizing

  • The chimney should be inspected for nesting animals trying to escape the cold. Squirrels and raccoons have been known to enter chimneys for this reason.
  • The damper should open and close with ease. Smoke should rise up the chimney when the damper is open. If it doesn't, this means that there is an obstruction in the chimney that must be cleared before the fireplace can be used. 
  • A chimney-cleaning service professional should clean the chimney if it has not been cleaned for several years. 
  • The damper should be closed when the fireplace is not in use. An open damper might not be as obvious to the homeowner as an open window, but it can allow a significant amount of warm air to escape. 
  • Glass doors can be installed in fireplaces and wood stoves to provide an extra layer of insulation.

Roof Winterizing

  • If debris is left in gutters, it can get wet and freeze, permitting the formation of ice dams that prevent water from draining. This added weight has the potential to cause damage to gutters. Also, trapped water in the gutter can enter the house and lead to the growth of mold. For these reasons, leaves, pine needles, and all other debris must be cleared from gutters. This can be done by hand or with a hose. 
  • Missing shingles should be replaced.

Landscape Winterizing

  • Patio furniture should be covered.
  • If there is a deck, it might need an extra coat of sealer. 

Adequate winterization is especially crucial for homes that are left unoccupied during the winter. This sometimes happens when homeowners who own multiple properties leave one home vacant for months at a time while they occupy their summer homes. Foreclosed homes are sometimes left unoccupied, as well. The heat may be shut off in vacant homes in order to save money. Such homes must be winterized in order to prevent catastrophic building damage.
 
In addition to the information above, InterNACHI advises the following measures to prepare an unoccupied home for the winter:
  • Winterize toilets by emptying them completely. Antifreeze can be poured into toilets and other plumbing fixtures.   
  • Winterize faucets by opening them and leaving them open.
  • Water tanks and pumps need to be drained completely.
  • Drain all water from indoor and outdoor plumbing.
  • Unplug all non-essential electrical appliances, especially the refrigerator. If no electrical appliances are needed, electricity can be shut off at the main breaker.  
 
In summary, home winterization is a collection of preventative measures designed to protect homes against damage caused by cold temperatures. These measures should be performed in the fall, before it gets cold enough for damage to occur. Indoor plumbing is probably the most critical area to consider when preparing a home for winter, although other systems should not be ignored.
2 Comments

Inspecting Ducted Returns In Your Home!

10/26/2017

0 Comments

 
Although inspection of return ducts is not a required step in a professional home inspection, return ducts are a vital component of the HVAC system. Because of this, home inspectors should familiarize themselves with the following key facts and practices in order to perform a superior inspection of the HVAC system.

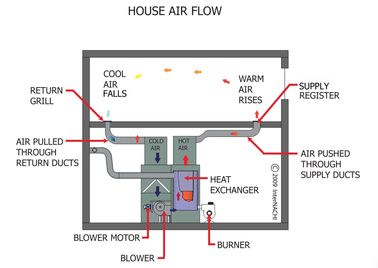
Home inspectors should take note that in order for central forced-air furnace and air conditioning systems to operate properly, the HVAC distribution system should be designed with adequate supply and return registers that provide conditioned air to all parts of the house and return stale air to the furnace for reconditioning.  Inadequate return air pathways can cause pressure imbalances from room to room, which can create drafts and temperature differences between rooms or floors, leading to complaints about comfort. Pressure imbalances can also cause the furnace and air-conditioning equipment to work harder than necessary. A well-designed return air strategy is critical for the performance of the HVAC system in an energy-efficient house, which may have lower airflow requirements to meet the lower heating and cooling loads. The return air must have a clear path back to the air handler from every room that has a supply outlet, with the exception of bathrooms or kitchens due to the potential for spreading odors through the house.

Each room can be individually ducted to the return side of the air handler; however, installing that much ducting is costly, and there may be space constraints that limit the feasibility of this approach. Utilizing a central return strategy is a simple and effective way to return stale air to the air handler (see Figure 1). When utilizing a central return strategy, one or more return registers should be placed in central hallways or stairwells adjacent to the main living spaces of the house, with at least one return per floor. These central returns should be ducted to the return side of the HVAC air handler, with air-sealed ducts that are insulated if they're located in an unconditioned space (see Figure 2). Building cavities (the space between wall studs or panned floor joists) should not be used as return air pathways; if un-ducted, these spaces are very difficult to air seal. Return air pathways that leak will draw air from unintended places in the house and can lead to undesirable pressure differences. Home inspectors should take note that a fully ducted return system will be easier to air seal and will have better airflow characteristics than building cavities used as return air pathways.

To ensure that stale air is able to return to these central returns from rooms that have closeable doors, such as bedrooms or offices, builders will often rely on door undercuts. Typical door undercuts of 1/2- to 3/4-inch by themselves do not allow adequate return volume, especially when carpet is installed, and they're not appropriate for an energy-efficient house. Door undercuts are not approved in the ACCA (Air Conditioning Contractors of America) Manual D. Other methods for providing an air pathway from closed rooms to central return registers are jump ducts and transfer grilles.

Return ducts are installed by the HVAC contractor. Return duct locations should be indicated on the HVAC design plans, which is something home inspectors can keep in mind. Tasks associated with this installation should be included in the contract for the appropriate trade, depending on the workflow at a specific job site.

How Professionals Install Return Ducts
1. Calculate the amount of return air needed. A target value for return capacity is two times the volume of the total supply air with an airflow velocity within the return of less than 500 feet per minute and the net free area of the grille sized 1.5 times the cross-sectional area of the return duct. ENERGY STAR requires that returns achieve a rater-measured pressure differential of ≤ 3 Pascals (0.012 inch water column) with respect to the main body of the house when bedroom doors are closed and the air handler is operating on the highest design fan speed. A rater-measured pressure differential of ≤5 Pascals (0.020 inch water column) is acceptable for rooms with a design airflow ≥150 cfm. The bedrooms can be pressure-balanced using any combination of transfer grilles, jump ducts, dedicated return ducts, and/or undercut doors.
2. Determine whether to use individual return ducts, one or more central ducts, or central ducts in combination with transfer grills, jump ducts, and/or undercut doors. Consider filter placement when making this decision. With individually ducted returns, the filter will need to be located at the equipment return air inlet. With a centrally located return, the filter can be located at the return grille. This configuration may make it easier for the homeowner to change or clean the furnace filter, if plans called for locating the furnace in a hard to reach location, such as an attic or crawlspace. 
​
  1. Consider the effects of noise when determining the placement of returns. A return duct that has a direct connection to the blower motor could transfer that blower noise to the living room.
  2. Consider size when locating central returns. Central return grilles are much larger than most supply grilles.

Install return ducts as the supply ducts are installed.
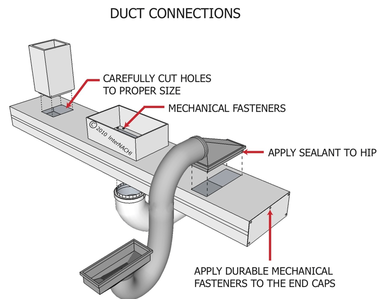
  1. Seal all seams, gaps and holes of the return duct system with mastic.
  2. Seal the return box to the floor, wall or ceiling with mastic, caulk and/or foam.
  3. Do not use building cavities as return air pathways.
Picture
Picture
Summary

HVAC distribution systems should be designed with adequate supply and return registers to provide conditioned air to all parts of the house and return stale air to the furnace for reconditioning. A well-designed return air strategy is critical for the performance of the HVAC system in an energy-efficient house. Home inspectors can familiarize themselves with these key facts and practices in order to better understand each vital component of an HVAC system. This can help in-progress inspections of HVAC systems, as well as during a home energy score evaluation. 
0 Comments

Crawlspace Inspecting 101

10/20/2017

0 Comments

 
Crawlspaces are host to a large number of conditions that may harm the house or inspectors. Never enter a crawlspace without proper personal protective equipment.
 Crawlspaces are notorious for the nasty discoveries made there by inspectors, and it isn’t hard to figure out why; for one thing, their cool, dark environment attracts 
undesirable pests and can promote dangerous conditions. And since crawlspaces are mostly unmonitored, hazards can breed there unchecked for 
Picture
long periods of time. The following are some of the more common dangers discovered in crawlspaces:

Mold & Fungus

  • Just like pests, mold and fungus can grow rapidly in crawlspaces. They are both a health concern as well as a cause of wood decay, which can require a costly repair. Airborne mold spores can potentially enter the living space from the crawlspace. Molds produce allergens (substances that can cause allergic reactions), irritants and, in some cases, potentially toxic substances called mycotoxins. Inhaling or touching mold or mold spores may cause allergic reactions in sensitive individuals. Allergic responses include hay fever-type symptoms, such as sneezing, runny nose, red eyes, and skin rash (dermatitis). Homes infected with molds and fungus are also much more difficult to sell, often requiring costly remediation prior to closing the deal.

Pests (wood destroying organism)

  • ​Dirt crawlspaces provide the environment that is enjoyed by ants, termites, and various other pests. Termites cannot survive long outside of their mud tubes, which you may see on foundation walls and piers. Carpenter ants should be plainly obvious as well, and both of theses pests can cause structural damage. Also bear in mind that where there are pests, there may also be pesticides, perhaps improperly applied, which is one reason why you should not enter crawlspaces without personal protective equipment. Snakes, spiders, bees and scorpions may also be lingering in the crawlspace, and while they pose little structural danger to the house, they certainly can harm you! Rapid retreat there can be difficult, so be cognizant of escape paths.

Hantavirus

  • Crawlspaces are perhaps the most likely sites in houses where hantavirus may be found. This is partly due to the fact that rodents that carry the pathogen are attracted to areas that are undisturbed by humans. Also, crawlspaces are generally dark places that lack ultraviolet (UV) radiation, which can rapidly inactivate the virus. Exposure to hantavirus may lead to Hantavirus Cardiopulmonary Syndrome (HCS), characterized by headaches, fever, difficulty breathing and, often, death. There is no known cure, vaccine or treatment that specifically targets HCS. However, if the symptoms are recognized early, patients may benefit from oxygen therapy.

Asbestos

  • ​Do not disturb asbestos! The microscopic fibers that cause illness become airborne when the insulation is handled or disturbed, and if it appears to be in good shape, it might not be a problem at all. Prolonged exposure to asbestos insulation can cause mesothelioma, which is a cancer of the lining of the chest and the abdominal cavity, as well as asbestosis, in which the lungs become scarred with fibrous tissue.

Standing Water or Sewage

  • ​Dirt crawlspaces are susceptible to water seepage, which can create a host of problems, such as microbial growth, odors, damage to stored belongings, and risk of electrical shock.

Structural Collapse

  •  If the home itself is unstable, it might be dangerous to enter its crawlspace. It is easy to become pinned, trapped or even crushed by unstable crawlspaces. Make sure someone knows that you are inspecting the crawlspace before you enter it.

Improper Wiring

  • Watch for loose wiring, open junction boxes, or wiring that has become loose and fallen to the floor. 

Source of Energy Waste

  • ​Traditionally, crawlspaces have been vented to prevent problems with moisture, and most building codes require vents to aid in removing moisture from the crawlspace. However, many building professionals now recognize that ventilated crawlspaces allow a great deal of heat loss in the winter and moisture intrusion in the summer from moist air.
0 Comments

Moisture Intrusion

10/10/2017

0 Comments

 
Moisture intrusion can be the cause of building defects, as well as health ailments for the building's occupants. Inspectors should have at least a basic understanding of how moisture may enter a building, and where problem areas commonly occur.

 
Some common moisture-related problems include:
  • structural wood decay; 
  • high indoor humidity and resulting condensation;
  • expansive soil, which may crack the foundation through changes in volume, or softened soil, which may lose its ability to support an overlying structure;
  • undermined foundations;
  • metal corrosion;
  • ice dams; and
  • mold growth.  Mold can only grow in the presence of high levels of moisture. People who suffer from the following conditions can be seriously (even fatally) harmed if exposed to elevated levels of airborne mold spores:
    • asthma;
    • allergies;
    • lung disease; and/or
    • compromised immune systems.​
Note:  People who do not suffer from these ailments may still be harmed by elevated levels of airborne mold spores.

How does moisture get into the house?

Moisture or water vapor moves into a house in the following ways:
  • air infiltration. Air movement accounts for more than 98% of all water vapor movement in building cavities. Air naturally moves from high-pressure areas to lower ones by the easiest path possible, such as a hole or crack in the building envelope. Moisture transfer by air currents is very fast (in the range of several hundred cubic feet of air per minute). Replacement air will infiltrate through the building envelope unless unintended air paths are carefully and permanently sealed;
  • by diffusion through building material. Most building materials slow moisture diffusion, to a large degree, although they never stop it completely;
  • leaks from roof;
  • plumbing leaks; 
  • flooding, which can be caused by seepage from runoff or rising groundwater; it may be seasonal or catastrophic; and
  • human activities, including bathing, cooking, dishwashing and washing clothes. Indoor plants, too, may be a significant source of high levels of humidity.

Climate Zones
 
In the northern U.S., moisture vapor problems are driven primarily by high indoor relative humidity levels, combined with low outdoor temperatures during the winter. In the southern U.S. (especially the southeast), the problem is largely driven by high outdoor humidity and low indoor temperatures during summer months. Mixed climates are exposed to both conditions and can experience both types of problems. Humid climates, in general, will be more of a problem than dry climates. Wind-driven rain is the main cause of leaks through the building envelope.
 Inspectors can check for moisture intrusion in the following areas:

Roofs
A roof leak may lead to the growth of visible mold colonies in the attic that can grow unnoticed. Roof penetrations increase the likelihood of water leaks due to failed gaskets, sealants and flashing. The number of roof penetrations may be reduced by a variety of technologies and strategies, including: 
  • consolidation of vent stacks below the roof;
  • exhaust fan caps routed through walls instead of the roof;
  • high-efficiency combustion appliances, which can be sidewall-vented;
  • electrically powered HVAC equipment and hot water heaters that do not require flue; and
  • adequate flashing. Oftentimes, inspectors discover missing, incorrectly installed or corroded flashing pipes.

​Plumbing
  • Distribution pipes and plumbing fixtures can be the source of large amounts of moisture intrusion. If the wall is moist and/or discolored, then moisture damage is already in progress. Most plumbing is hidden in the walls, so serious problems can begin unnoticed.
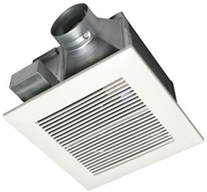
  • One of the most important means of moisture management in the bathroom is the exhaust fan. A non-functioning exhaust fan overloads the bathroom with damp air. If the exhaust fan doesn’t turn on automatically when the bathroom is in use, consider recommending switching the wiring or switch. The lack of an exhaust fan should be called out in the inspection report. The fan should vent into the exterior, not into the attic.
  • The bathroom sink, in particular, is a common source of moisture intrusion and damage. Although overflow drains can prevent the spillage of water onto the floor, they can become corroded and allow water to enter the cabinet.  
  • Use a moisture meter to check for elevated moisture levels in the sub-floor around the toilet and tub.
  • Bathroom windows need to perform properly in a wide range of humidity and temperature conditions. Check to see if there are any obvious breaks in the weatherstripping and seals. Are there are stains or flaking on the painted surfaces?
  • Check showers and bathtubs. Is the caulking is cracked, stiff or loose in spots? Are there cracked tiles or missing grout that may channel water to vulnerable areas? If some water remains in the bathtub after draining, it may be a warning sign of possible structural weakening and settlement in the floor beneath the tub.

Utility Room
  • The water heater tank should be clean and rust-free.
  • The area around the water softener tank should be clean and dry.
  • Check that all through-the-wall penetrations for fuel lines, ducts, and electrical systems of heating system are well-sealed. All ducts should be clean and dust-free. Inspect the air supply registers in the house for dust accumulation.   
  • Filters, supply lines, exterior wall penetrations, vents, ductwork and drainage of the cooling system must all be in good working order to avoid moisture problems.  

Attic
  • Look for stains or discolorations at all roof penetrations. Chimneys, plumbing vents and skylight wells are common places where moisture may pass through the roof. Any such locations must be inspected for wetness, a musty smell and/or visible signs of mold.
  • Are there areas of the insulation that appear unusually thin?
  • Rust or corrosion around recessed lights are signs of a potential electrical hazard.

Foundations

Model building codes typically require damp-proofing of foundation walls. The damp-proofing shall be applied from the top of the footing to the finished grade. Parging of foundation walls should be damp-proofed in one of the following ways:
  • bituminous coating;
  • 3 pounds per square yard of acrylic modified cement;
  • 1/8-inch coat of surface-bonding cement; or
  • any material permitted for water-proofing.

In summary, moisture can enter a building in a number of different ways. High levels of moisture can cause building defects and health ailments. 
0 Comments

Common Electrical Conductors During A Residential Home Inspection

10/6/2017

0 Comments

 
Poorly installed and maintained electrical cables are a common cause of electrical fires in homes. Many older homes contain wiring that is now considered obsolete or dangerous. InterNACHI inspectors should understand the basic distinctions between the different types of cable systems so that they can identify unsafe conditions.

Romex Cables

Romex is the trade name for a type of electrical conductor with non-metallic sheathing that is commonly used as residential branch wiring. The following are a few basic facts about Romex wiring:
  • Romex™ is a common type of residential wiring that is categorized by the National Electrical Code (NEC) as underground feeder (UF) or non-metallic sheathed cable (NM and NMC).
Picture
  • NM and NMC conductors are composed of two or more insulated conductors contained in a non-metallic sheath. The coating on NMC cable is non-conducting, flame-resistant and moisture-resistant. Unlike other cables commonly found in homes, they are permitted in damp environments, such as basements. 

  • Underground feeder conductors appear similar to NM and NMC cables except that UF cables contain a solid plastic core and cannot be “rolled” between fingers.

 
The following NEC regulations apply to Romex conductors:
  • They are not permitted in residential construction higher than three stories, or in any commercial construction. 

  • They must be protected, secured and clamped to device boxes, junction boxes and fixtures. 

  • Support devices that may damage the cables, such as bent nails and overdriven staples, are not permitted. 

  • NM and NMC cables should be secured at intervals that do not exceed 4½ feet, and they should be secured within 12 inches of junction boxes and panels to which they are attached. Cables that do not comply with this rule can sag and are vulnerable to damage. 

  • They are intended as permanent wiring in homes and should not be used as a substitute for appliance wiring or extension cords.

Note:  Some communities have never allowed the use of Romex wiring in residential construction. Armored cable is typically used in these communities. 

Armored Cables (AC)
 
Armored cable (AC), also known as BX, was developed in the early 1900s by Edwin Greenfield. It was first called “BX” to abbreviate “product B – Experimental,” although AC is far more commonly used today. Like Romex cables, they cannot be used in residences higher than three stories, and the rules for protection and support of AC wiring are essentially the same as the rules for Romex. Unlike Romex, however, AC wiring has a flexible metallic sheathing that allows for extra protection. Some major manufacturers of armored cable are General Cable, AFC Cable Systems, and United Copper Systems.

Service Entry (SE) Conductors

Knob & Tube Wiring

These cables begin at the splice and enter the meter. They are not permitted inside homes, with the exception of “style R” SE cable that can serve as interior wiring in branch circuits for ovens and clothes dryers. Style R cables should be clearly marked on their jacket surfaces.
 
Knob-and-Tube (KT) Wiring
 
Most houses constructed prior to World War II were wired using the knob-and-tube method, a system that is now obsolete. They are more difficult to improve than modern wiring systems and are a fire hazard. Knob-and-tube wiring is supported with ceramic knobs, and runs intermittently though ceramic tubes beneath framing and at locations where the wires intersect. Whenever an inspector encounters knob-and-tube wiring, s/he should identify it as a defect and recommend that a qualified electrician evaluate the system. The following are a few reasons why inspectors should be wary of this old wiring system:
Picture
​
  • The dissipated heat from knob-and-tube wiring can pose a fire hazard if the wires are enveloped in building insulation. A possible exception is fiberglass insulation, which is fire-resistant, although even this type of insulation should not cover knob-and-tube wiring. The homeowner or an electrician should carefully remove any insulation that is found surrounding KT wires. 

  • Knob-and-tube wiring is more vulnerable to damage than modern wiring because it is insulated with fiber materials and varnish, which can become brittle. 

  • Some insurance companies refuse to write fire insurance for houses with this type of wiring, although this may be remedied if an electrician can verify that the system is safe. 

  • Disregarding any inherent inadequacies, existing KT cable systems are likely to be unsafe because they are almost guaranteed to be at least 50 years old.
In summary, inspectors should understand the different types of conductors that are commonly found in homes. 
0 Comments

Air Quality Inspections

9/28/2017

0 Comments

 
Taking air samples during a air quality inspection is crucial for several reasons. Mold spores are not visible to the naked eye, and the types of mold present in a home can often be determined through a laboratory analysis. Having the air samples analyzed can also help provide evidence of the scope and severity of a mold issue, a well as help in assessing human exposure. 
Air quality samples can be used to gather data about mold spores that might be present on the inside of the home. These samples are taken with a specific pump that forces air through a collection device that catches the mold spores. Then the samples are sent out to a third party laboratory to analyze. InsideOut Inspections utilizes the top of the line products to ensure an accurate reading every time!
Picture

When & When Not To Sample

Samples are generally best taken if visual, non-invasive examination reveals apparent mold growth or conditions that could lead to growth, such as moisture intrusion or water damage.  Musty odors can also be a sign of mold growth.  If no sign of mold or potential for mold is apparent, one or two indoor air samples can still be taken, at the discretion of the inspector and client, in the most lived-in room of the house and at the HVAC unit.  

Outdoor air samples are also typically taken as a control for comparison to indoor samples.  Two samples -- one from the windward side and one from the leeward side of the house -- will help provide a more complete picture of what is in the air that may be entering the house through windows and doors at times when they are open.  It is best to take the outdoor samples as close together in time as possible to the indoor samples that they will be compared with.

InsideOut inspectors should avoid taking samples if a resident of the house is under a physician’s care for mold exposure, if there is litigation in progress related to mold on the premises, or if the inspector’s health or safety could be compromised in obtaining the sample.  Residential home inspectors also should not take samples in a commercial or public building
0 Comments
<<Previous
Forward>>

    InsideOut Team   

    This blog is to help people better understand their home inspection. It is filled with great in depth advice. If you'd like a topic covered just send us an email on what you need more information on!

    Archives

    November 2020
    October 2020
    March 2020
    November 2018
    April 2018
    March 2018
    February 2018
    January 2018
    December 2017
    November 2017
    October 2017
    September 2017
    July 2017
    May 2017
    April 2017
    March 2017
    February 2017
    January 2017
    April 2014

    Categories

    All
    Appliances
    Home Inspection
    Household Features
    Inspection Reasons

    RSS Feed

    Newsletter Sign Up

Submit

InsideOut
Contact
Information

SE MI: 734.224.0342
N MI:
231-714-6880
OH: 419.215.3856

8314 Whiteford Center Rd
Ottawa Lake, MI 
49267

1354 W Bear Lake Rd NE
Kalkaska, MI
​49646
​
Fax: 
734-224-0241

What We Do

Residential Home Inspections
Commercial Inspections
Radon Testing
Water Quality Testing
Septic/Leach Field Inspections
Sewer Scope Inspections
Well Inspections
Pest Inspections
Structural Inspections
Manufactured Home Certifications
Mold Testing
Infrared Inspections
Home Binder

Social Media

© 2021 InsideoutInspections.net. All Rights Reserved.
  • Home
  • Services
    • Well Inspections
    • Residential Inspection
    • Commercial Inspection
    • Infared/Thermal Imaging
    • Radon Testing
    • Mold Inspections
    • Septic Inspections
    • Pest Inspections
    • Water Quality Testing
    • Structural Inspections
    • Sewer Scope
    • Manufactured Home Certs
    • Home Binder
  • Areas Served
  • Schedule
  • Reviews
  • Contact
  • Blog