Home Inspection For SE Michigan, Northwest Ohio, Toledo Ohio
  • Home
  • Services
    • Well Inspections
    • Residential Inspection
    • Commercial Inspection
    • Infared/Thermal Imaging
    • Radon Testing
    • Mold Inspections
    • Septic Inspections
    • Pest Inspections
    • Water Quality Testing
    • Structural Inspections
    • Sewer Scope
    • Manufactured Home Certs
    • Home Binder
  • Areas Served
  • Schedule
  • Reviews
  • Contact
  • Blog

10 Ways to Prepare Your Home for Inspection

3/25/2020

1 Comment


Did You Know There Are Different Types of Home Inspections?

During a real estate transaction you will most likely have your home inspected if you are selling. 
There are a few different ways sellers can approach the inspection process. 
  1. Pre-Inspections can be done prior to listing your home. This will give you an idea of what could be flagged later on in the transaction and give you a chance to fix any issues before even listing the home. 
  2. Most commonly, buyers will submit an offer on your home stating it is "contingent upon home inspection". This would mean an inspection would be completed on your home after an accepted offer, but before moving forward any further in the process. 
  3. You could list your home for sale "as is". This option is usually sold for a fair cash price and could be well below the market value. This option really only makes sense in investment properties.

Move-In Certified Inspections


InsideOut offers Pre-Inspection certifications and they are a huge selling point for any listing. If you know you are entering into a hot market and want your home to move quickly, this option will absolutely help. When you hire InsideOut for a pre-inspection we will come out and preform and inspection just as we would if we were hired by the buyer. We will provide you with a very detailed report and make sure to flag and health and safety issues that could be a deal-breaker when selling your home. After issuing you the completed inspection report InsideOut will return to the residence to inspect that any issues that were flagged during our initial inspection were corrected. Once everything has been completed we will put a Certified Pre-Inspection sign in your front yard right next to your for sale sign. 

Buyer Purchased Home Inspection


If your buyer chooses us for their home inspection they become our customer however, that does not mean that we are not on the same team. We compiled a list of 10 ways that you as the seller can help us and yourselves when entering into the inspection period on your home.  These common items are quick/easy fixes that can allow our time at your home to be as quick and efficient as possible. Taking these 10 steps will also allow provide less opportunity for items to be flagged in your inspection. Please find the printable 10 step form attached below! 

Contact us to learn about all of the inspection services we offer
Call Us
Email Us
10_steps_inspection.2020.pdf
File Size: 477 kb
File Type: pdf
Download File

1 Comment

Attic Pull-Down Ladders

4/24/2018

0 Comments

 
Attic pull-down ladders, also called attic pull-down stairways, are collapsible ladders that are permanently attached to the attic floor. Occupants can use these ladders to access their attics without being required to carry a portable ladder.
Common Defects
​

 Homeowners, not professional carpenters, usually install attic pull-down ladders. Evidence of this distinction can be observed in consistently shoddy and dangerous work that rarely meets safety standards. Some of the more common defective conditions observed by inspectors include:
  • cut bottom cord of structural truss. Often, homeowners will cut through a structural member in the field while installing a pull-down ladder, unknowingly weakening the structure. Structural members should not be modified in the field without an engineer’s approval;
  • fastened with improper nails or screws. Homeowners often use drywall or deck screws rather than the standard 16d penny nails or ¼” x 3” lag screws. Nails and screws that are intended for other purposes may have reduced shear strength and they may not support pull-down ladders;​
  • fastened with an insufficient number of nails or screws. Manufacturers provide a certain number of nails with instructions that they all be used, and they probably do this for a good reason. Inspectors should be wary of “place nail here” notices that are nowhere near any nails;
  • lack of insulation. Hatches in many houses (especially older ones) are not likely to be weather-stripped and/or insulated. An uninsulated attic hatch allows air from the attic to flow freely into the home, which may cause the heating or cooling system to run overtime. An attic hatch cover box can be installed to increase energy savings;
Picture
  • loose mounting bolts. This condition is more often caused by age rather than installation, although improper installation will hasten the loosening process;
  • attic pull-down ladders are cut too short. Stairs should reach the floor; 
  • attic pull-down ladders are cut too long. This causes pressure at the folding hinge, which can cause breakage;
  • improper or missing fasteners;
  • compromised fire barrier when installed in the garage;
  • attic ladder frame is not properly secured to the ceiling opening;
  • closed ladder is covered with debris, such as blown insulation or roofing material shed during roof work. Inspectors can place a sheet on the floor beneath the ladder to catch whatever debris may fall onto the floor; and
  • cracked steps. This defect is a problem with wooden ladders. 
  • In sliding pull-down ladders, there is a potential for the ladder to slide down quickly without notice. Always pull the ladder down slowly and cautiously. 

 Relevant Codes
The 2009 edition of the International Building Code (IBC) and the 2006 edition of the International Residential Code (IRC) offer guidelines regarding attic access, although not specifically pull-down ladders. Still, the information might be of some interest to inspectors.

2009 IBC (Commercial Construction):
1209.2 Attic Spaces. An opening not less than 20 inches by 30 inches (559 mm by 762 mm) shall be provided to any attic area having a clear height of over 30 inches (762 mm). A 30-inch (762 mm) minimum clear headroom in the attic space shall be provided at or above the access opening.

2006 IRC (Residential Construction):
R807.1 Attic Access. Buildings with combustible ceiling or roof construction shall have an attic access opening to attic areas that exceed 30 square feet (2.8m squared) and have a vertical height of 30 inches (762 mm) or more. The rough-framed opening shall not be less than 22 inches by 30 inches, and shall be located in a hallway or readily accessible location. A 30-inch (762 mm) minimum unobstructed headroom in the attic space shall be provided at some point above the access opening.

Tips that inspectors can pass on to their clients:
  • Do not allow children to enter the attic through an attic access. The lanyard attached to the attic stairs should be short enough that children cannot reach it. Parents can also lock the attic ladder so that a key or combination is required to access it.
  • If possible, avoid carrying large loads into the attic. While properly installed stairways may safely support an adult man, they might fail if he is carrying, for instance, a bag full of bowling balls. Such trips can be split up to reduce the weight load.
  • Replace an old, rickety wooden ladder with a new one. Newer aluminum models are often lightweight, sturdy and easy to install.
​
In summary, attic pull-down ladders are prone to a number of defects, most of which are due to improper installation.
0 Comments

Inspecting Gutters & Downspouts

4/9/2018

0 Comments

 
Picture
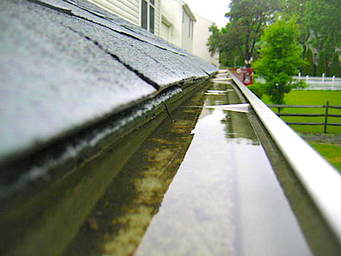
InsideOut Home Inspectors are required to inspect the gutters and downspouts as part of the roof portion of the home inspection.  
Some important factors a home inspector should consider include:
  • that the guttering system is adequately sized to prevent runoff;
  • that the gutters are free of rust, cracks and holes in order to prevent leaking; and
  • that the downspouts divert water 4 to 6 feet away from the home's foundation.
           
A few inches of rain falling on the roof of a house can produce several thousand gallons of water runoff. This runoff must be channeled away from the home's foundation. Otherwise, the excess water can quickly saturate the soil surrounding the building and wick through the foundation to the interior. (See Figure 1 below.) Once inside, this moisture can lead to a variety of problems, including mold and wood rot. Excess moisture can also cause indoor air quality problems. 
Picture
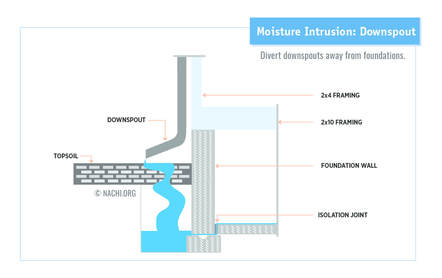
Figure 1:  If not drained away from the house, the volume of water coming off a roof in a large rainstorm can quickly saturate the soil and wick through the foundation into the interior of the building.

Gutter System Basics
Gutter systems consist of two parts: 1) gutter channels that run horizontally along the roof edge to collect runoff; and 2) the downspouts that carry the collected water to grade level. Roofing gutters should slope down toward the downspout at the rate of 1/16-inch per foot, or 1/4-inch per 5 to 10 feet. An angle less than this won't allow water to move effectively, and much more of an angle will cause the water to move at too great a speed, potentially resulting in overflow over end caps and corners. 

In terms of standards, InsideOut home inspectors are not required to measure the amount of gutter slope. To do it accurately would be time-consuming, would require a transit or water level, and would exceed InterNACHI's Standards of Practice. A more practical approach is to make sure that all gutters slope toward the downspout. In judging adequate slope, look for signs of standing water in portions of the gutter away from the downspout, and eyeball the margin against the fascia. 
​

Gutter channels are typically available in 4, 5, and 6-inch sizes. They are referred to by their shape: there are K-style gutters (also known as "ogee" because the shape resembles this molding type); and U-style gutters (or half-round), as shown in Figure 2 below. The style differences are principally aesthetic; there is no substantial difference in performance. Larger sizes conduct more water at a faster rate, provided that there are enough downspouts to drain the gutter channels without overflowing.
Picture
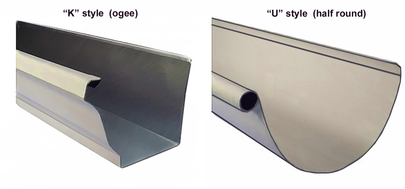
Figure 2:  Standard gutter styles found in building supply centers include the K and U styles. The difference is purely aesthetic.  (Image courtesy of the U.S. Dept. of Energy's Building America Solution Center.

Downspout Basics


Most downspouts are made of the same material as the gutter system, so they tend to suffer from similar problems, but with a few twists -- especially in the area of mechanical damage from proximity to high-traffic areas.
Downspouts should be inspected for:
  • the connection between the downspout and the gutter;
  • proper attachment of the downspout to the structure;
  • leakage in joints (sometimes they will have been installed upside-down);
  • impact damage from doors of vehicles parked nearby; and
  • downspouts that terminate onto another roof surface.
Climate

The following are some climate-specific considerations for different types of gutter systems:
  • Hot-Dry and Mixed-Dry Climates:  Gutters are not required in all dry climates. However, a wide roof overhang will keep occasional runoff away from the home.  As with any structure, the grade at the foundaiton should slope away from the building.  Metal, rather than vinyl, gutters and downspouts are safer in areas susceptible to wildfires. 
  • Hot-Humid and Mixed-Humid Climates:  In areas with heavy rainfall, the gutter and rain leader capacity should be increased. Kickout and diverter flashing will prevent high water volume from spilling over the gutters and running down the exterior walls of the home. 
  • Marine Climate:  In areas that experience high winds and heavy rains, the gutter and rain leader capacities should be increased, especially for large roofs. 
  • Cold and Very Cold Climates:  Depending on the building codes for the jurisdiction, it may be wise to avoid the use of gutters in areas that receive high snow loads.  If gutters are installed, ice buildup inside the gutters during freezing and below-freezing temperatures can lead to ice damming, which can cause moisture intrusion through the roof's sheathing and any unsealed openings.  There are products available at building supply stores that will help prevent Ice Dams from forming.

Tips for Homeowners
​

Inspectors can relay the following tips to their clients to help them properly and safely maintain their home's gutter system:
  • Observe common-sense safety precautions (and enlist a spotter, if available) when using a ladder to reach the gutter system.  Always maintain three point contact and don't over-reach; move the ladder instead.
  • If mounting the roof, wear footwear with gripping treads to prevent slipping.
  • Wear gloves to protect hands and arms from sharp debris, as well as from animals and insects that may be hiding in the gutters. 
  • A gutter scoop is a convenient tool for removing leaves and other debris. 
  • Cleaning gutters can take a substanial amount of water. Place a garden hose in the gutters and downspouts to flush them out, making sure that the water is directed away from the home via the downspouts. This will help reduce the chances of saturating the soil around the foundation. 
  • Covered gutter systems may be effective in preventing excessive debris buildup, but these are not maintenance-free.
  • Homeowners can install a rainwater harvesting system (if allowed in their jurisdiction) that includes a drainage mechanism to handle overflow. 

If the home is surrounded by deciduous trees, they may shed their leaves onto the roof and into the gutters. So, home inspectors should impress upon their clients that regular gutter system maintenance is necessary to prevent moisture intrusion problems.  
​
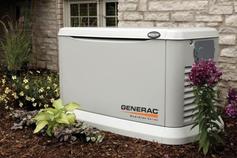
  The home inspector should also explain to his clients the importance of a properly functioning gutter system, and the potential problems that an undersized or damaged system can create.

This article was sourced from the U.S. Department of Energy and InterNACHI®.   
0 Comments

Inspecting Generators & Hazards

4/2/2018

1 Comment

 
Homeowners may use a generator to supply electricity to their home in the case of a power outage, either out of necessity or convenience. Inspectors may want to know about generators and the potential hazards they present when improperly wired or utilized.   
​

Generator Types
There are two main types of generators:  permanently installed, standby generators; and gasoline-powered, portable generators. 
 
Standby Generators 

Standby generators typically operate on natural gas or liquid propane. They remain fixed in place outside the home and are designed to supply on-site power to specified circuits through a home's electrical wiring. These generators work in tandem with a manual or automatic transfer switch, which automatically detects an interruption in grid-powered  electricity and ​subsequently transfers over electrical input to the generator.
 The transfer switch suspends input from the generator once it senses that utility-powered electricity has resumed. Generators for small- to medium-size homes are typically air-cooled and employ fans to regulate the temperature inside the unit. Liquid-cooled units are used for the larger energy loads in larger homes.
Picture
Some advantages of standby generators are as follows:
  • They may be turned on manually, or they may be programmed to switch on automatically in the case of a power outage even when no one is home.
  • Power may be supplied for extended periods of time.
  • Hard-wired systems, such as a home's furnace, well pump and air conditioner, may maintain continuous power.
  • Uninterrupted power can be supplied to systems that must remain on continuously, such as medical equipment used for breathing, etc.
Disadvantages of standby generators are as follows:
  • Installation may require a permit.
  • A qualified technician, such as an electrician, is required to install the ATS and to determine the electrical load requirements for the circuits in a home.
  • Routine maintenance is required.
  • Standby generators may be prohibitively expensive.
Portable Generators 

Gasoline-powered, portable generators are typically smaller in size and power capacity than permanently installed generators. They are designed so that corded electrical devices may be plugged directly into them. 
Picture
Gasoline-powered, portable generators are typically smaller in size and power capacity than permanently installed generators. They are designed so that corded electrical devices may be plugged directly into them. 
 
Advantages to portable generators are as follows:
  • Portable generators are versatile. They may be used at home or transported and utilized in remote locations, such as a campground or a construction site.
  • They do not require complicated installation.
  • They typically do not require permits.
  • Portable units are generally less expensive than standby generators.   
Disadvantages of portable generators:
  • Devices that are hard-wired into a home's electrical system cannot be powered by a portable generator if no transfer switch is installed.     
Hazards
  • Portable and standby generators produce dangerous carbon monoxide (CO) gas, which can be deadly if inhaled.
  • Inexperienced installers are exposed to the risk of electrical shock. Only qualified electricians should attempt to install a generator.
  • Overloading a generator may result in reduced fuel efficiency, damage to appliances or fire.
  • Standby generators or their required transfer switches that are incorrectly wired (or missing) may result in "back-feed" -- a hazardous condition in which an electrical current is fed back into the grid -- which could potentially electrocute and kill homeowners, utility workers, and others who are using the same utility transformer. 
  • Connecting a portable generator directly into a home's wall outlet can also cause dangerous back-feed.
  • Generators that are exposed to water or that are not properly grounded can cause electrocution.
  • Gasoline for portable generators is highly flammable and may cause a fire when exposed to an open flame or when spilled on the hot generator.
  • Over-taxed cords attached to a portable generator may cause a fire.
Inspecting A Generator
​

InsideOut inspectors check for the following: 
  • Generators should never be used anywhere indoors, even if the area is ventilated.
  • Portable generators placed outside should not be near doors, vents or open windows leading into the home.
  • Carbon-monoxide detectors should be installed in case CO is accidentally released into the home.
  • A standby generator hard-wired into a home should have a transfer switch installed to prevent backfeeding.  An inspector can locate this device situated between
  • Generators should be properly grounded.
  • Units should be dry and shielded from contact with liquid.
  • Only heavy-duty electrical cords that are rated for outdoor use should be plugged into portable generators.
  • Electrical cords should not have any punctures or exposed wiring.
  • Cords running from portable generators should be kept out of the way of foot traffic and should not run underneath rugs.
  • The total electrical capacity of the generator should exceed the power requirements of the devices that the unit is supplying.
  • Fuel for portable generators should be stored away from the home and children in clearly labeled and durable containers.

In summary, generators can be lifesavers during a power outage, but they present serious health and safety concerns if they are not installed and used properly. 
1 Comment

Inspecting for Defects in Older Buildings

3/26/2018

0 Comments

 
While you can’t predict the lurking dangers in an unfamiliar home, its age offers clues about what you can expect to encounter. Older homes, especially those that have remained in the same hands for much (or all) of their lifetime, are often plagued by a common set of defects that InsideOut inspectors and potential home buyers may want to learn about.
Some of the more prevalent issues of older homes are as follows.
  • Lead is a toxic metal that was once commonly used in the manufacture of household paint and plumbing fixtures, and as an additive to gasoline. While it has long been prohibited in new construction, lead-based paint and plumbing that weren't removed may present a significant health hazard. Homes constructed 
prior to 1978 may contain lead paint, which can be ingested by small children or contaminate surrounding soil and vegetable gardens. It is easily identifiable by its alligator-like flaking pattern. Lead pipes, too, were used in homes up until the late 1940s, and they may allow lead to leach into drinking water. They can be identified by their dull gray color and the ease by which they can be scratched by keys or coins.
Picture
  • Asbestos insulation, which can increase the chances of developing lung cancer and mesothelioma, was used in homes between 1930 and 1950. Asbestos insulation should be left undisturbed until it can be removed by a qualified professional, as its fibers can be inhaled when they are airborne, creating a significant health hazard.
  • Older homes were not constructed to meet modern energy efficiency requirements. They may suffer thermal losses from single-pane windows, insufficient or compressed insulation, leaking ductwork, and inefficient heaters and other appliances. It should be noted, however, that older homes better capitalize on natural sources of lighting, heating and ventilation through the use of design features such as exterior shutters, shade trees, and thick, heat-retaining masonry walls.
  • Buried oil tanks were often abandoned and forgotten after homes switched to newer fuel sources. Today, these tanks pose a safety hazard to homeowners and their neighbors, as their contents may leak into surrounding soil. Disposal guidelines vary and may call for removal of the tank or filling it with sand or gravel. Soil testing may be required to investigate whether an abandoned fuel tank has leaked underground.
  • Obsolete electrical components pose a fire and safety hazard, such as:
    • aluminum wiring. From about 1965 to 1973, single-strand aluminum wiring was sometimes used in place of copper branch-circuit wiring in residential electrical systems due to the escalating price of copper. After a decade of use by homeowners and electricians, weaknesses were discovered in the metal, which led to its disuse as a branch wiring material. Although properly maintained aluminum
Picture
                   wiring is acceptable, aluminum will generally become defective faster than copper due to certain qualities                       inherent in the metal. It can be identified by its color or the labels “CO/ALR,” “aluminum” and “AL”;
  • knob-and-tube (K&T) wiring.  This was an early standardized method of electrical wiring in buildings from about 1880 to the 1940s. While codes do not require its removal, K&T wiring often suffers from unsafe modifications, old age, overheating, and lack of a ground wire. It can be identified by its characteristic porcelain insulating tubes;
    • a lack of ground-fault circuit interrupters (GFCIs). Homes built before the 1970s may not have been equipped with GFCI protection, which guards against overloads, short circuits and ground faults; and
    • a lack of grounded receptacles, which provide a safe path to ground for stray electrical current. Most major appliances, such as stoves, refrigerators and computers, have three-prong plugs and require three-slot or grounded receptacles. Homes in the U.S. built before 1962 were not constructed with three-slot receptacles.
  • Wells, cesspools and septic tanks were commonly used before homes and buildings were connected to public sewer and water systems. If they were abandoned and not removed, these elements pose hazards related to their deterioration and collapse.
  • Radon is a naturally occurring gas that has been identified as the second leading cause of lung cancer in the United States. It usually enters the home through cracks in the foundation, a common problem found in vintage construction. Radon cannot be seen, smelled or tasted, so concerned homeowners should consult with their InsideOut inspector about radon testing during their next scheduled inspection.
0 Comments

Carpet Mold: Identification, Prevention and Removal

3/12/2018

0 Comments

 
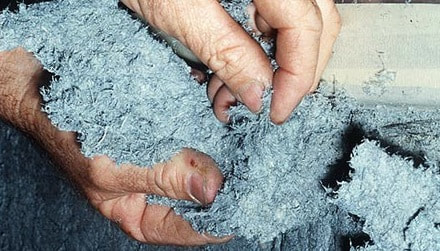
The Dangers of Mold
Molds produce allergens, which are substances that can cause allergic reactions, as well as irritants and, in some cases, potentially toxic substances known as mycotoxins.  Inhaling or touching mold or mold spores may cause allergic reactions in sensitive individuals.  Allergic responses include hay fever-type symptoms, such as sneezing, runny nose, red eyes, and skin 
rash (dermatitis).  Allergic reactions to mold are common.  They can be immediate or delayed.  Molds can also cause asthma attacks in people with asthma who are allergic to mold.  In addition, mold exposure can irritate the eyes, skin, nose, throat and lungs of both mold-allergic and non-allergic people.  Symptoms other than the allergic and irritant types are not commonly reported as a result of inhaling mold, but can also occur.
Picture
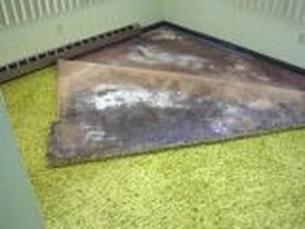
Carpet at Risk
Carpeting is an area of the home that can be at high risk for mold growth.  In order to grow, mold needs moisture, oxygen, a food source, and a surface to grow on.  Mold spores are commonly found naturally in the air.  If spores land on a wet or damp spot indoors that contains dust for them to feed on, mold growth will soon follow. Wall-to-wall carpeting, as well as area rugs, can provide an ample breeding ground for mold if conditions are right.  At especially high risk for mold growth are carpeting located below ground level in basements, carpet in commonly moist or damp climates, and carpet that has been wet for any period of time. 

Identifying Mold in Carpeting
Just because mold is not immediately apparent or visible on a carpet's surface does not mean that mold growth is not in progress.  In fact, mold will probably only be visible on the surface of carpets in unusually severe cases of growth, such as carpet damaged in flooding that has remained wet for some time. InsideOut Inspections can detect specific types of mold spores by using state of the art equipment to pull air samples from your home.  The following are some examples of identifiable instances where mold growth has occurred or is likely to occur:
  • visible mold growth:  As stated above, this can be a rare case, but sometimes it may be obvious from visual inspection that mold growth is occurring.  Carpet in this condition is most likely not salvageable and should be disposed of and replaced.  Often, even if mold growth is not visible on the top of carpeting, it may be occurring underneath the carpet where it can't be easily seen.  Carpet suspected of containing mold should always be examined on both sides.

  • carpet mildew:  Any discoloration or odor on carpeting that might be described as mildew is probably a case of mold.

  • wet or water-damaged carpet:  Any carpet that has been subjected to water damage from flooding or standing water will most likely need to be disposed of.  Conditions are ripe for mold growth, in this case.  Even if visibly apparent mold growth has not yet begun, it is highly likely to happen unless the carpet is completely removed, cleaned and dried within 24 to 48 hours.  Even then, removal and cleaning are not guaranteed to prevent mold growth.  It is more likely that the carpet will need to be replaced.

  • wet padding beneath carpet:  If padding beneath the carpet has become wet for any reason, or has become moist from condensation, the padding as well as the carpet on top are at risk for mold growth.  The padding may need to be replaced, as will the carpet, in some cases.

  • basement carpet:  Carpeting in basements below grade level is especially at risk in areas where humidity is high, or where wide temperature swings can produce condensation.

  • odors and stains:  There is a wide range of things that can cause odors and stains on carpets.  If mold is suspected, samples can be taken and sent for analysis to determine if mold growth has occurred.
Preventing Mold Growth in Carpeting
The best method for combating mold is to not allow mold growth in the first place.  The best way to do so is by ensuring that conditions conducive to growth do not exist.  Below are some ways to prevent mold growth in carpets.
  • Reduce indoor humidity.  The use of dehumidifiers will help control moisture in the air, depriving mold spores of the water they need to grow into mold.  A range of 30% to 60% humidity is acceptable for interiors.

  • Install intelligently.  Do not install carpeting in areas that are likely to be subject to frequent, high moisture.  Carpet in a bathroom, for example, will quickly turn to a breeding ground for mold growth due to the high humidity from constant water use in that area.

  • Choose high-quality carpet padding.  Solid, rubber-slab carpet padding with anti-microbial properties is available.  It is slightly more expensive than other types of padding but can be helpful for preventing the growth of mold, especially in climates prone to periods of high humidity.

  • Never allow standing water.  Carpet exposed to standing water will quickly be ruined.  If standing water ever occurs because of a leak or a spill, all carpeting exposed must be immediately cleaned and dried.  The top and bottom surfaces of the carpet, any padding, and the floor underneath must be cleaned and completely dried within a short period of time after exposure to standing water if the carpet is to be saved.  If a large flood has occurred, or if standing water has been present for any extended period of time, the carpet will probably need to be replaced.

  • Clean smart.  When carpeting needs to be cleaned, try to use a dry form of cleaning, when possible.  If any water, liquid, or other moisture has come in contact with the carpet during cleaning, be sure it is dried thoroughly afterward.

Removing Mold From Carpet
In many cases, if mold has grown on carpet, cleaning will not be possible.  If growth has occurred on more than one area of the carpet, or if there is a large area of growth, the carpet will probably need to be replaced. 
Picture
Small areas of growth that have been quickly identified can sometimes be dealt with.  Detergent and water used with a steam-cleaning machine may be enough to clean the carpet thoroughly.  It is then important to ensure that the carpet dries completely after cleaning to prevent the growth from recurring.  Stronger cleaning agents can be substituted if detergent does not work.  Anything stronger than detergent or common rug-cleaning products should first be tested on an inconspicuous area of the carpet to ensure that the rug will not be damaged during cleaning. 
About 24 hours is a reasonable amount of time to wait after testing to be sure that wider cleaning will not discolor or damage the carpet.
​

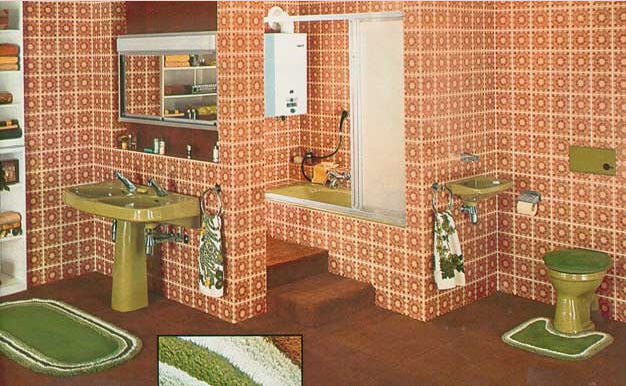
Another option in instances where mold growth is not widespread is to remove the ruined section of the carpet.  If cleaning has been attempted unsuccessfully, the area of mold growth may be removed and replaced with a patch of similar carpet.  Of course, this will only work in situations where aesthetics are not a big concern, since exactly matching the patch to the original carpet may be difficult and the seam may be visible.  If mold has grown in more than one area of the carpet, or if the area of growth is larger than a couple of feet, this will probably not be an effective method of mold removal.
 
As with all areas of the interior at risk for mold growth, prevention is the best method of control for carpet mold.  Eliminating high-moisture conditions and preventing the risk of flooding or standing water will reduce the possibility of growth.  Inspectors will want to know where to look for and how to identify mold growth in carpeting.  It is also helpful to know how to determine if carpet should be replaced, or whether there is a possibility of cleaning and saving it.

0 Comments

Carpeted Bathrooms

3/5/2018

0 Comments

 
Carpeted bathrooms are bathrooms that have carpeted floors instead of traditional floor surfaces, such as tile or vinyl. Despite their tendency to foster mold and bacteria, carpets are sometimes installed in residential bathrooms for aesthetic purposes.
Advantages of Carpets in Bathrooms
  • They make bathrooms appear more warm and inviting.
  • They are softer than tile and many people find them comfortable on bare feet.
  • Bathroom slip hazards are reduced. It is easier to slip on hard bathroom surfaces, such as tile, than on carpet.
  • Installation is generally quick and inexpensive.
Carpeted Bathroom
Disadvantages of Carpets in Bathrooms
 
The pad beneath the carpet may soak up large amounts of moisture.  Some of the common ways that carpets may come into contact with moisture in bathrooms include:
  • Steam from the shower will condense on the carpet.
  • Water splashes from the tub or shower.
  • Water sheds from shower/tub occupants as they step onto the carpet.
  • Water splashes out of the sink.
  • Water drips from the vanity.
  • Water leaks from the toilet.
The presence of moisture in the pad will lead to the growth of decay fungi on the wood or oriented strand board (OSB) sub-floor. The sub-floor will be decayed and weakened by mold. Mold also releases spores that can cause respiratory ailments, especially for those with certain health problems. Inspectors can use moisture meters to determine if there is excess moisture beneath a carpet.
​
 In addition to potential mold growth beneath the carpet, bacteria can accumulate in carpeting that surrounds the toilet. Bacteria are contained in urine, which can be accidentally deflected onto the carpet.
 
The following are recommendations that InterNACHI inspectors can pass on to clients who are experiencing urine- or moisture-related problems with their bathroom carpet:
  • Clean the carpet regularly to remove any mold or urine that may be present.
  • Keep the carpet as dry as possible. Various devices exist that prevent water from bypassing the shower curtain.
  • Install a bathroom fan, if one is not installed already. If a fan is installed, operate it more often.
  • Inspectors can inform their clients about why they are experiencing problems.

In summary, carpets installed in bathrooms can trap moisture and urine, substances that can cause structural damage and health problems.
0 Comments

Ceramic Tile and Stone Inspection

2/26/2018

0 Comments

 
Ceramic tile and stone are popular flooring materials, but each is subject to damage if not properly maintained.
Ceramic tile, due to its low required maintenance, ease of cleaning, and resistance to physical damage, is one of the most popular flooring materials available today. Made primarily from clay and other organic, as well as inorganic, materials, the tile is available in both glazed and unglazed finishes. Ceramic tiles are vulnerable to a number of defects, however, that can be inspected for the following issues:
Ceramic Tile
Ceramic Tile
  • uneven tiles. Examine the tiles to see how level they are in relation to each other. Uneven tiles probably weren’t set correctly in the mortar, and reinstallation may be necessary;
  • cracks, loose tiles and splitting. Cracks in ceramic tile are the result of movement in the tile underlayment, excessive expansion or contraction of the building during freeze-thaw cycles, abuse, or improper installation. Minor cracks can be repaired with grout that matches the color of the tile, but larger cracks may require replacement of the tile;
  • crazing. If tiles were cooled too quickly after kiln-firing, they can develop fine surface cracks, most often appearing as a fine, web-like network akin to cracked ice. Crazing is much more common in older, historic tiles than in modern tiles, but it still happens today. Crazing increases the rate at which tiles hold dirt, leading to discoloration; and
  • cracked or discolored grout lines. Unsealed or improperly sealed grout will readily absorb moisture from the air or standing water, especially around showers and sinks. Some types of porous tiles may actually powder or spall if subjected to constant moisture. Damaged or discolored grout can be removed and replaced.
Craving
Natural stone tiles have a beauty that is difficult to recreate. They add an air of elegance and character to any home. Stone is more durable than ceramic tile, too, as it’s less likely to scratch, and holds up well under foot traffic. The unique and complex patterns can appear busy and overwhelming in large, empty rooms, however.  Stone is also more difficult to maintain than ceramic tile. The following maintenance and repair tips are recommended:

  • Apply an impregnating sealant. An oliophobic sealant will repel both oil and water, and it’s especially helpful in the kitchen. Try to use a solvent-based sealant, as they’re generally better than water-based varieties.
  • Quickly clean up any acids. Some of the more common stone tiles are marble and limestone, which are calcite-based, meaning that they will corrode when exposed to acids, such as vinegar or lemon juice. Unfortunately, sealants cannot protect stone against these substances, which will etch into the stone if left standing. Igneous stones, such as basalt and granite, as well as ceramic tile, are less vulnerable to acid damage.
  • Lay walk-off mats or area rugs on either side of exterior entrances and instruct people to wipe their feet before they enter the home. The main cause of surface scratching on stone floors is dirt from outside that becomes caught under shoes and scraped across the floor. Scratching can dull the stone’s natural polish and damage its natural crystals, causing it to lose its shine and reflection.
  • Use a good-quality stone soap, preferably one containing linseed oil, for regular maintenance and cleaning. In most cases, you can simply mop the soap and leave it to dry.​
In summary, ceramic and stone can be superb flooring materials, but water, acid, improper installation, and other adverse conditions may create defects.
0 Comments

Condensation Inspections

2/19/2018

0 Comments

 
Condensation, also called sweating, forms on building materials when the temperature drops below the dew point, which is the temperature at which droplets of water vapor are forced so closely together that they coalesce into liquid water.  Because of their characteristic thermal conductivity, components made of metal are usually the first places where condensation will appear in a building.
Condensation can be a problem because droplets can pool and destroy building materials, such as when condensed water chronically drains from a toilet and weakens the bathroom tile floor and subfloor. Condensation can also pool and encourage the growth of mold, which is a serious health hazard. Dripping overhead pipes can be an extreme annoyance in a finished basement, as they may damage carpets, furniture and valuable electronics. Pooled condensation can even cause an electrical fire, or electrocute building occupants.
Picture
Where does condensation typically form?
  • plumbing drains. Condensation may collect on cast-iron or copper drain piping if a leaking plumbing fixture sends cold water through the building’s drain piping system;
  • cold water pipes. In humid environments, condensation will quickly form on water pipes that distribute cold water;
  • water pressure tanks. Especially in colder or more humid climates, water pressure tanks may experience condensation when water is flowing at a high and steady rate; ​
  • plumbing fixtures that are in constant use or are defective and constantly refilling, especially toilets. Toilets commonly sweat in the summer due to high levels of humidity, unlike windows, which host condensate in the winter when the outside temperature is very low.
Metal that does not come into contact with cold water or air rarely exhibits excessive condensation, even though it’s exposed to the same moisture-laden air as everything else around it. A water pipe that carries only warm water, for instance, seldom cools below the dew point. And non-metal building materials that do come into contact with cold water or air (such as plastic drains and piping) often lack the thermal conductivity to become cold enough to be the source of condensation.
 
Metals also vary in their thermal conductivity.  Thus, they tend to cause water vapor to condense.  Inspectors can be aided by a rule of thumb that states that a metal’s ability to transfer heat (and, therefore, create condensation) is roughly equal to that metal’s electrical conductivity. Electricians and some inspectors may know that, of all metals, copper is the second-best conductor of heat and electricity, meaning that it’s more likely to respond to a brief burst of cool water or air than other metals, such as steel or lead. The metal with the greatest conductivity is silver, but it’s far too expensive to be used in ordinary construction.
Picture
Condensation is more of a problem in older homes, which often lack a vapor barrier or sealers in the concrete. In this instance, moisture in the ground is forced through the foundation and masonry, which is why condensation is commonly found in the basements of older buildings.  The two strategies used to reduce condensation are to lower the relative humidity of the air and to keep surfaces from becoming cold. These strategies can be practiced in the following ways:
  • Use a dehumidifier. This is a simple, effective appliance used to lower the humidity of the air, as it forces water vapor to condense into a water tank so it cannot condense elsewhere. An air conditioner can also dehumidify the air.
  • Remove plants from the home. This will decrease relative humidity, as their transpiration of moisture is a significant source of water vapor in homes.
  • Insulate cold surfaces. Insulation will keep surfaces from becoming cold, and it can easily be applied to water pipes and water pressure tanks. Fiberglass insulation should be avoided, as it’s ineffective when wet and it can be the source of mold growth. Plastic foam wrap is an adequate material for this purpose. Keep in mind that by adding thermal insulation to water pipes, they can no longer be counted on to supply radiant heat to their surroundings.
  • Ventilate the basement. However, this tactic might be counterproductive if the outside air is more humid than the indoor air.
  • Add heat where condensation is a particular problem.
Also, keep in mind that what appears to be condensation may actually be a water leak. If insulation and dehumidification don’t seem to improve the condensation problem -- especially if it’s appearing in only one place –- homeowners should contact a qualified plumber.
 
In summary, condensation will form on cold surfaces if certain precautions are not taken.  If left unmitigated, it can lead to moisture-related problems that can affect structural components, as well as the occupants' health. 
0 Comments

Central Humidifiers: What, How & Why!

2/12/2018

0 Comments

 
Humidifiers are devices that humidify air so that building occupants are comfortable. Central humidifiers are hard-wired into a house’s plumbing and forced-air heating systems.

 
What is humidity?
Humidity refers to the amount of moisture in the air. “Relative humidity” signifies the amount of moisture in the air relative to the maximum amount of water the air can contain before it becomes saturated. This maximum moisture count is related to air temperature in that the hotter the air is, the more moisture it can hold. For instance, if indoor air temperature drops, relative humidity will increase.

How do central air humidifiers work?
Central air humidifiers are integrated into the forced-air heating system so that they humidify air while it is being heated. The water that is used by the device is pumped automatically into the humidifier from household plumbing, unlike portable humidifiers, which require the user to periodically supply water to the device. Humidifiers are available in various designs, each of which turns liquid water into water vapor, which is then vented into the house at an adjustable rate.

Why humidify air?
Certain airborne pathogens, such as those that cause the flu, circulate easier in dry air than in moist air. Moist air also seems to soothe irritated, inflamed airways. For someone with a cold and thick nasal secretions, a humidifier can help thin out the secretions and make breathing easier.
Indoor air that is too dry can also cause the following problems:
  • damage to musical instruments, such as pianos, guitars and violins;
  • dry skin;
  • peeling wallpaper;
  • static electricity, which can damage sensitive electrical equipment, cause hair to stick up, and can be painful or annoying; and 
  • cracks in wood furniture, floors, cabinets and paint.
Picture
Central Humidifier Dangers
Humidifiers can cause various diseases. The young, elderly and infirm may be particularly at risk to contamination from airborne pollutants, such as bacteria and fungi. These can grow in humidifiers and get into the air by way of the vapor where it can be breathed in. Some of the more common diseases and pathogens transmitted by humidifiers are:
  • Legionnaires’ Disease. Health problems caused by this disease range from flu-like symptoms to serious infections. This problem is generally more prevalent with portable humidifiers because they draw standing water from a tank in which bacteria and fungi can grow;
  • thermophilic actinomycetes. These bacteria thrive at temperatures of 113° to 140° F and can cause hypersensitivity pneumonitis, which is an inflammation of the lungs; and 
  • “humidifier fever,” which is a mysterious and short-lived, flu-like illness marked by fever, headache, chills and malaise, but without prominent pulmonary symptoms. It normally subsides within 24 hours without residual effects.
Other problems associated with humidifiers include:
  • accumulation of white dust from minerals in the water. These minerals may be released in the mist from the humidifier and settle as fine white dust that may be small enough to enter the lungs. The health effects of this dust depend on the types and amounts of dissolved minerals. It is unclear whether these minerals cause any serious health problems;
  • moisture damage due to condensation. Condensed water from over-humidified air will appear on the interior surfaces of windows and other relatively cool surfaces. Excessive moisture on windows can damage windowpanes and walls, but a more serious issue is caused when moisture collects on the inner surfaces of exterior walls. Moisture there can ruin insulation and rot the wall, and cause peeling, cracking or blistering of the paint; and
  • accumulation of mold. This organic substance grows readily in moist environments, such as a home moistened by an over-worked humidifier. Mold can be hazardous to people with compromised immune systems. 
Designs and Maintenance
  • drum-type humidifier:  has a rotating spongy surface that absorbs water from a tray. Air from the central heating system blows through the sponge, vaporizing the absorbed water. The drum type requires care and maintenance because mold and impurities can collect in the water tray. According to some manufacturers' instructions, this tray should be rinsed annually, although it usually helps to clean it several times per heating season.
Picture
  • flow-through or “trickle” humidifier:  a higher quality though more expensive unit than the drum-type, which allows fresh water to trickle into an aluminum panel. Air blows through the panel and forces the water to evaporate into the air stream. Excess water exits the panel into a drain tube. This design requires little maintenance because the draining water has a “self-cleaning” effect and, unlike the drum-type humidifier, there is no stagnant water.​
Other tips that InterNACHI inspectors can pass on to their clients:
  • If equipped with a damper, it should be closed in the summer and opened in the winter. The damper may appear as a knob that can be set to “summer” or “winter” setting, or it may be a piece of metal that can be inserted to cover the duct opening.
  • The humidifier is controlled by a humidistat, which must be adjusted daily. Some new models do this automatically, although most require daily attention from building occupants. The humidistat should contain a chart that can be used to identify the proper setting based on the outdoor temperature. If this adjustment is not performed, condensation will likely collect on cool surfaces and potentially lead to mold or wood rot. Many homeowners do not know that this calibration is necessary.
  • The furnace might need to be checked for rust. Some humidifiers are installed inside the plenum of the furnace, which can be damaged by rust if the humidifier leaks.
  • Central humidifiers may have a solid core that should be replaced each year. The manufacturer’s instructions should be consulted regarding this replacement.​
In summary, central humidifiers are used to humidify air to make it more comfortable, but they can cause health problems and building damage if they are not properly maintained. 
0 Comments
<<Previous

    InsideOut Team   

    This blog is to help people better understand their home inspection. It is filled with great in depth advice. If you'd like a topic covered just send us an email on what you need more information on!

    Archives

    November 2020
    October 2020
    March 2020
    November 2018
    April 2018
    March 2018
    February 2018
    January 2018
    December 2017
    November 2017
    October 2017
    September 2017
    July 2017
    May 2017
    April 2017
    March 2017
    February 2017
    January 2017
    April 2014

    Categories

    All
    Appliances
    Home Inspection
    Household Features
    Inspection Reasons

    RSS Feed

    Newsletter Sign Up

Submit

InsideOut
Contact
Information

SE MI: 734.224.0342
N MI:
231-714-6880
OH: 419.215.3856

8314 Whiteford Center Rd
Ottawa Lake, MI 
49267

1354 W Bear Lake Rd NE
Kalkaska, MI
​49646
​
Fax: 
734-224-0241

What We Do

Residential Home Inspections
Commercial Inspections
Radon Testing
Water Quality Testing
Septic/Leach Field Inspections
Sewer Scope Inspections
Well Inspections
Pest Inspections
Structural Inspections
Manufactured Home Certifications
Mold Testing
Infrared Inspections
Home Binder

Social Media

© 2021 InsideoutInspections.net. All Rights Reserved.
  • Home
  • Services
    • Well Inspections
    • Residential Inspection
    • Commercial Inspection
    • Infared/Thermal Imaging
    • Radon Testing
    • Mold Inspections
    • Septic Inspections
    • Pest Inspections
    • Water Quality Testing
    • Structural Inspections
    • Sewer Scope
    • Manufactured Home Certs
    • Home Binder
  • Areas Served
  • Schedule
  • Reviews
  • Contact
  • Blog